- Print
- DarkLight
- PDF
This article applies to BOOST EMPOWER licenses
Purpose of the article
This article describes how to use the stamp feature. The illustrations provided are related to the web application. For the Outlook plugin, please refer to the corresponding article.
Prerequisite
To apply a stamp on a match, it is necessary to make the configuration de la correspondance de l'espace in which the email will be archived.
Apply a stamp
You have received an email in your inbox. Select it and use the stamp feature on the toolbar.

Then complete the dialog window with the desired space and stamp.
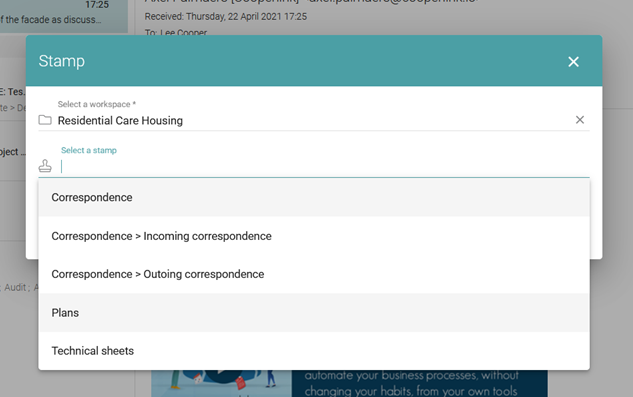
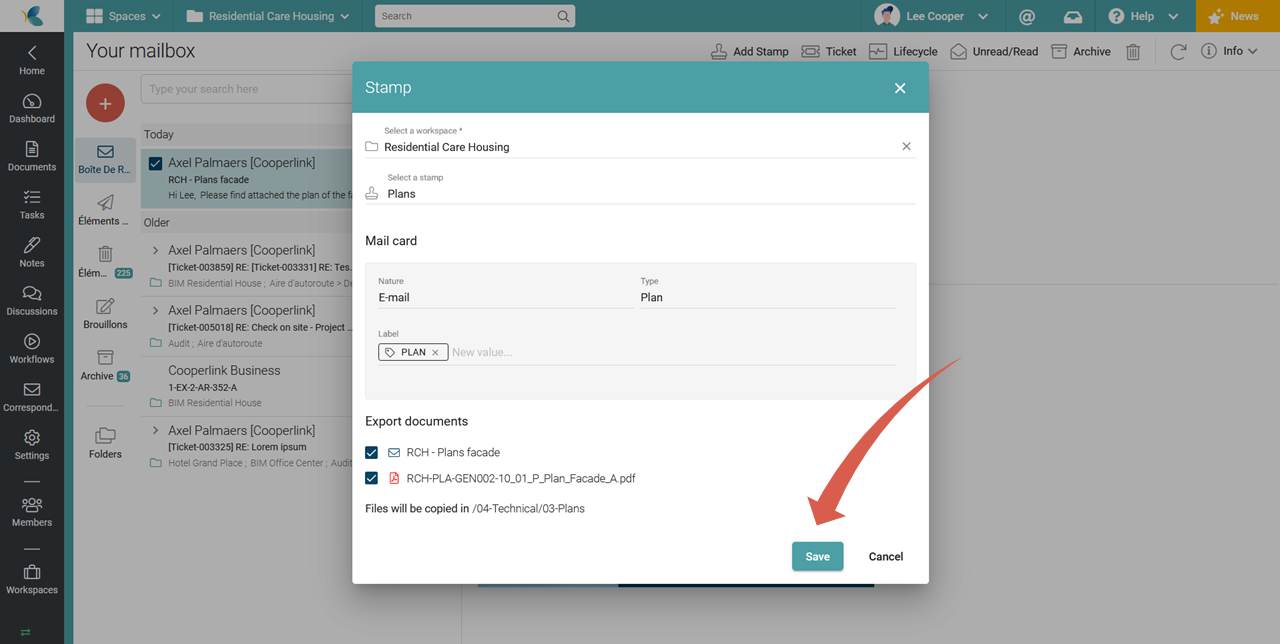
Depending on the configuration and the stamp selected, the dialog window offers other options on the screen. In particular, the correspondence card will be enriched with the default values of the stamp and the e-mail and its attachments will be offered to you for export. The window tells you to which directory the files will be copied.
You can change the default values as well as the selected attachments.
Then tap Apply.
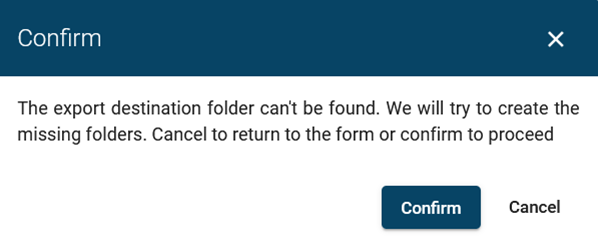
The directory does not exist
When the destination directory does not yet exist, a message notifies you and prompts you to create it.
Your email has become a collaborative element
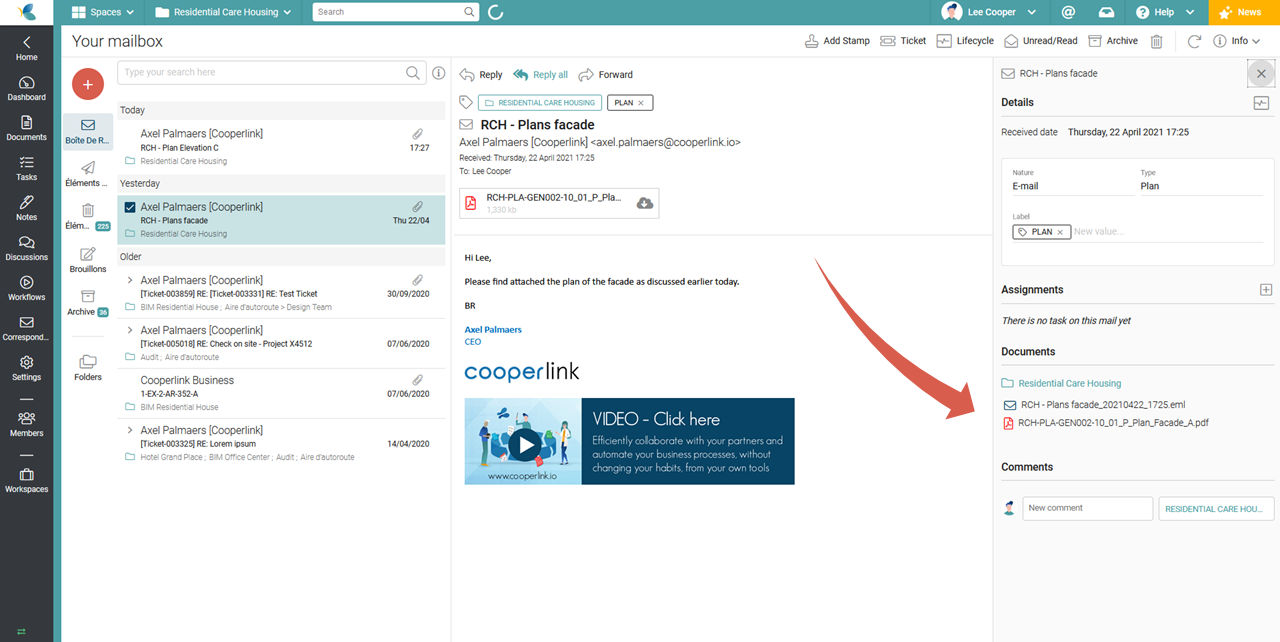
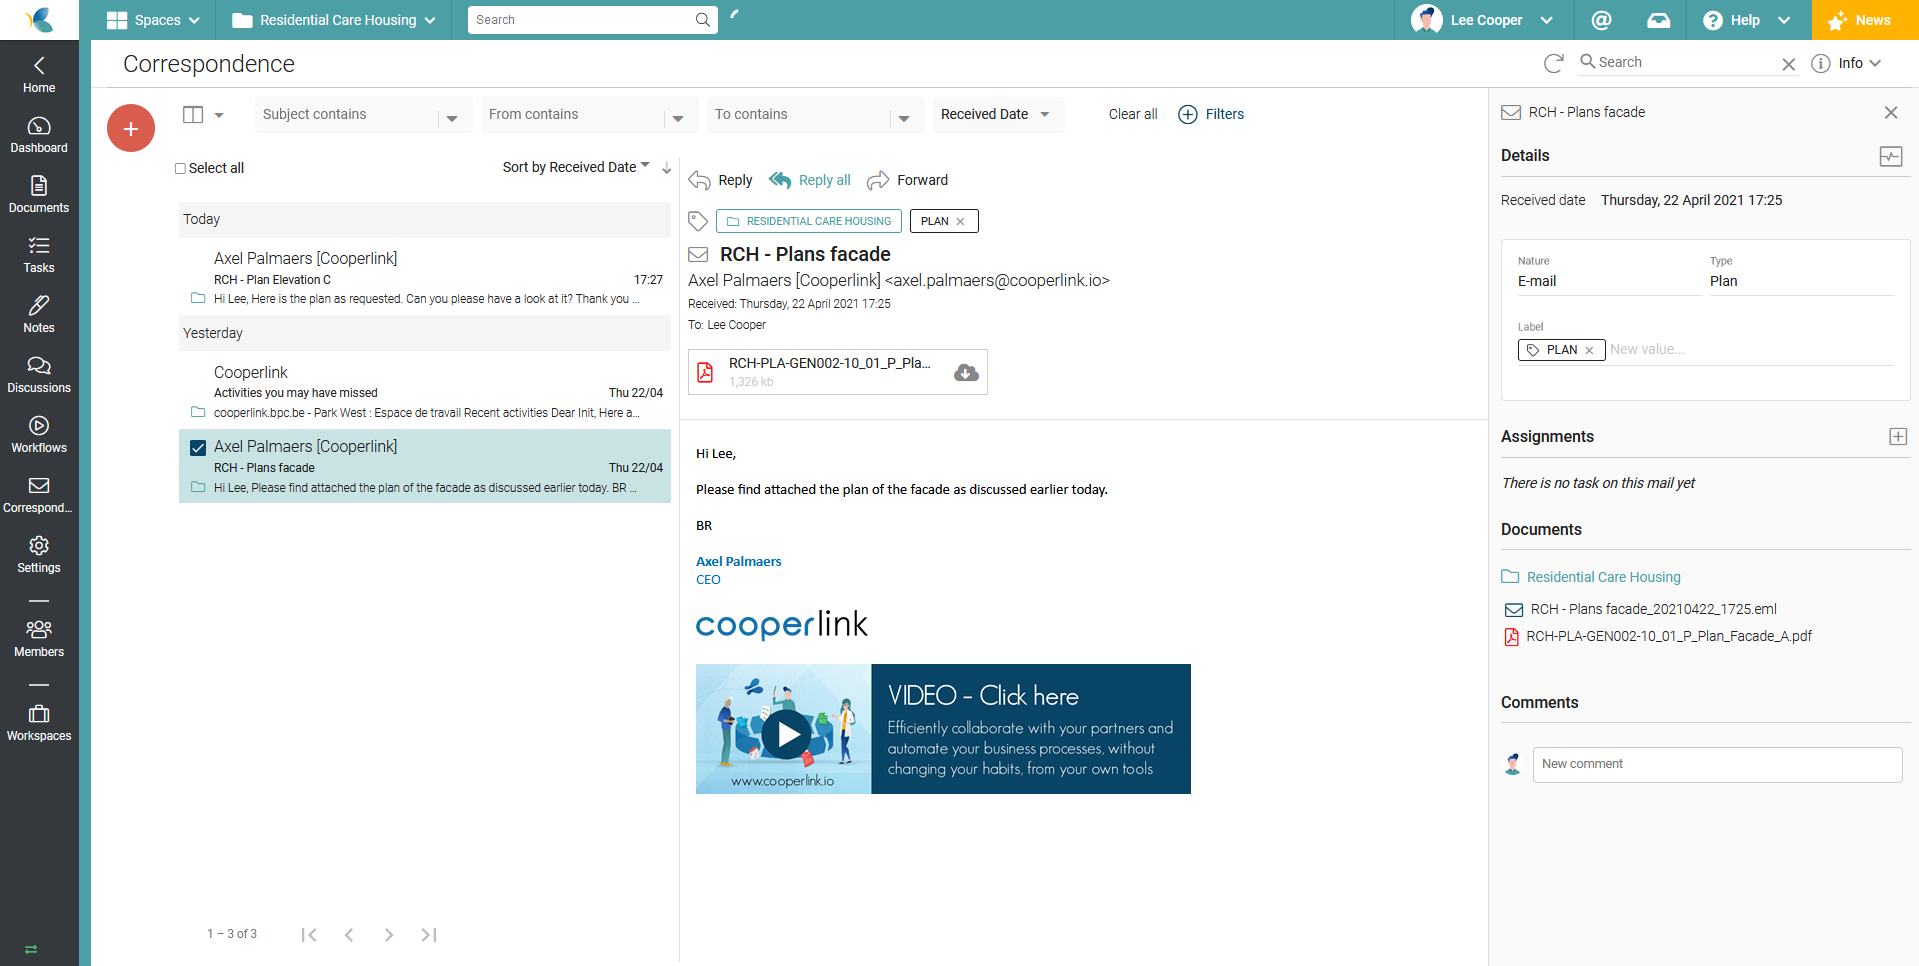
Once the stamp is applied, the email is automatically saved in the selected space. The correspondence card and the exported documents are completed with the default values defined in the stamp. Your email is now collaborative. You can add a task, lifecycle, or comment.
Exported files also appear as linked documents in the side drawer for easier access.
Results
Archived correspondence
Your e-mail is now saved as correspondence in the relevant space. All members of this project now have access to this email. You can associate task, comment, edit metadata. Your colleagues can also reply directly to this email even if they are not the original recipient.
Exports as files
The exported files are also available in the documents module. By selecting the exported file, the original email appears as a linked item.


