
This article applies to BOOST EMPOWER licenses
Purpose of the article
The functionality of tampon makes it possible to apply an efficient automation of emails and their classification. This article shows you how to configure buffer templates.
Prerequisite
To be able to do this, you must have administrator rights.
Although optional, it is recommended to create correspondence and document cards to allow optimal configuration of the stamps.
Configuration
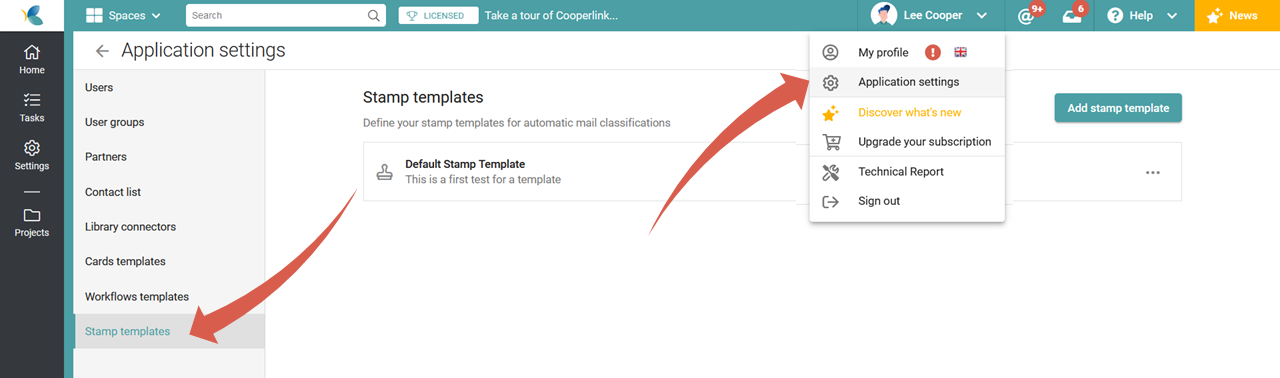
Go to the application settings and select the stamp templates tab. Then create a new template by clicking Add Buffer Template.
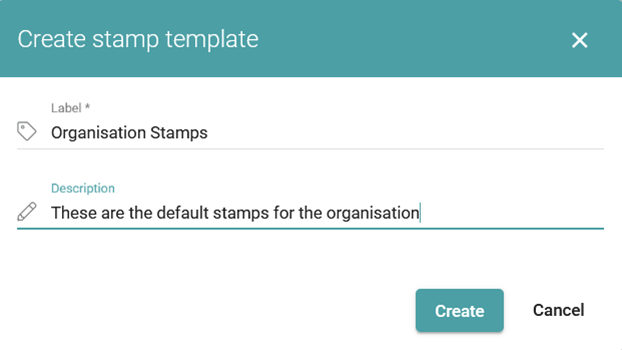
Cooperlink prompts you to give your model a name and description.
Add a buffer
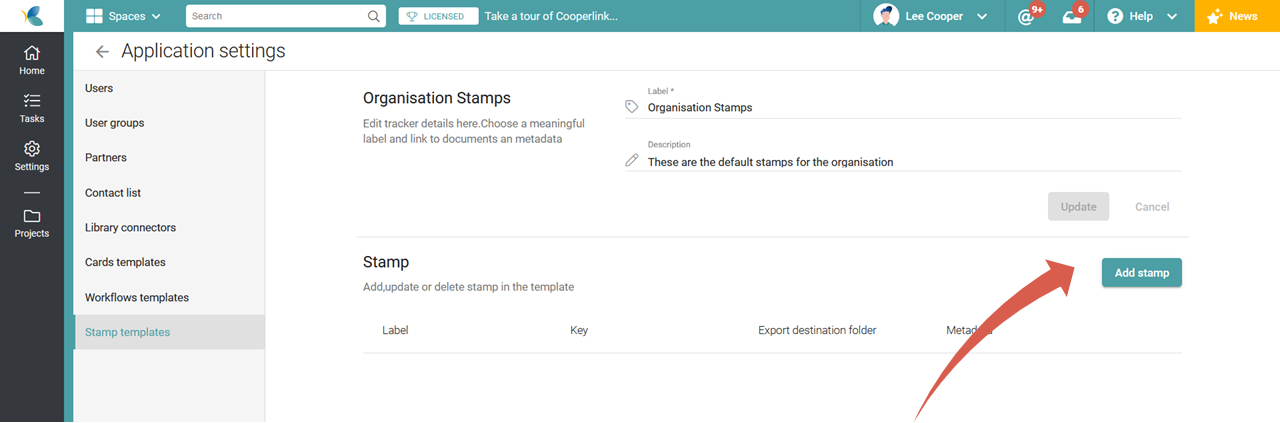
Once the template is created, you will then be prompted to create the configuration for each buffer. Then click Add Buffer.
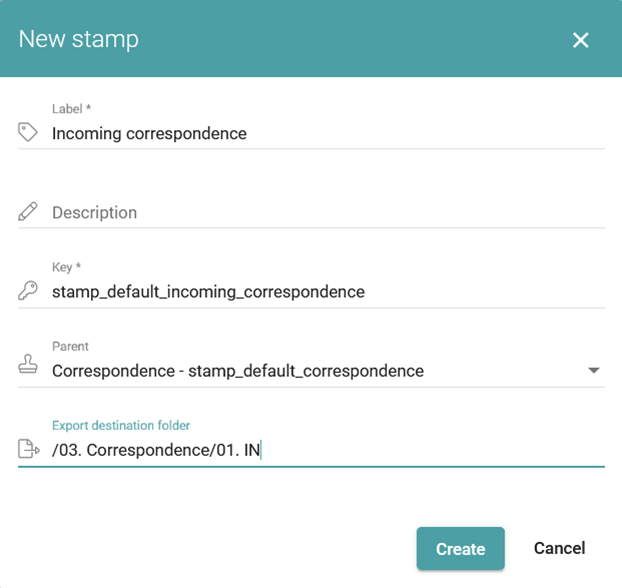
A dialog window opens. Specify the label (that is, the name displayed to the user). Define a unique key and destination directory for the exported files. Buffers are hierarchical. It is therefore possible to specify its parent stamp.
- For organization-level keys: stamp_<modèle_organisation>_<nom_explicite_tampon>
- For project-level keys: stamp_<nom_projet>_<nom_explicite_tampon>
Configure default values for metadata
Cooperlink allows you to enrich documents and correspondence using metadata. These are presented in the form of cartes to form a kind of identity document of the element.
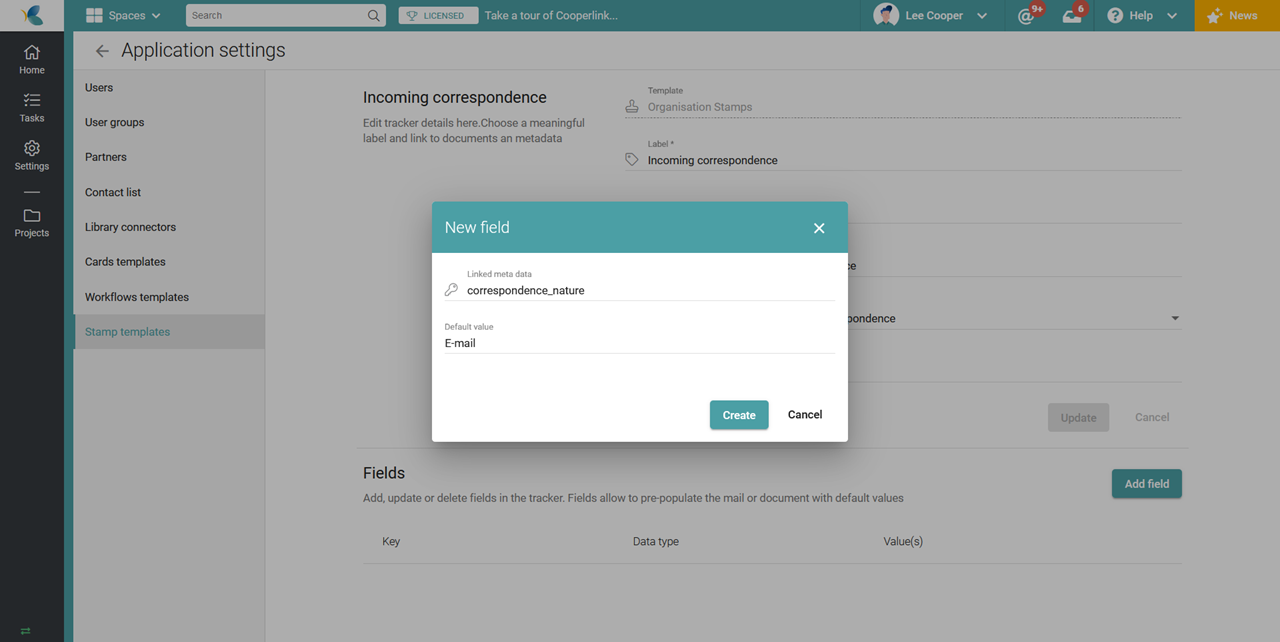
When a buffer is applied, it is possible to propose default values for the metadata of the different cards. To do this, click Add Field. Select the desired field and specify the default value to apply.
Each metadata is defined by a type of value (e.g. free text, numeric or value list). The value to be applied therefore depends on the type of metadata.
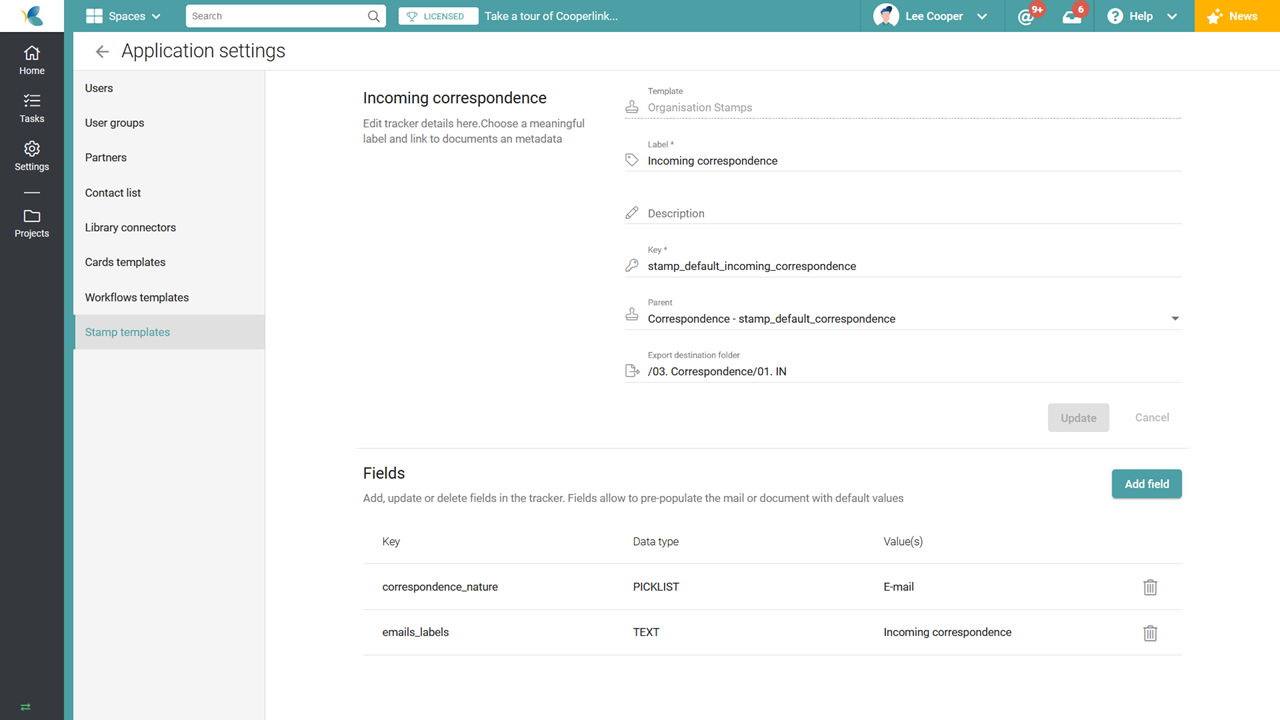
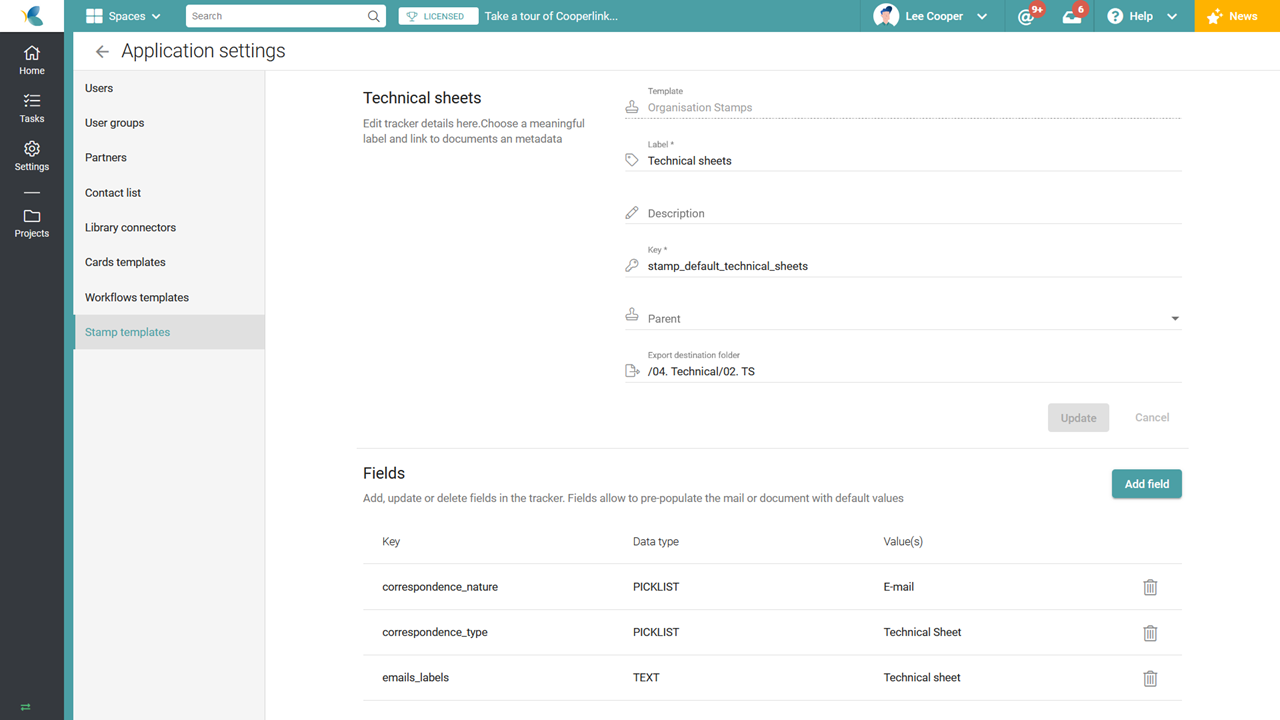
After the metadata is configured, the buffer configuration screen is presented as follows (two examples):
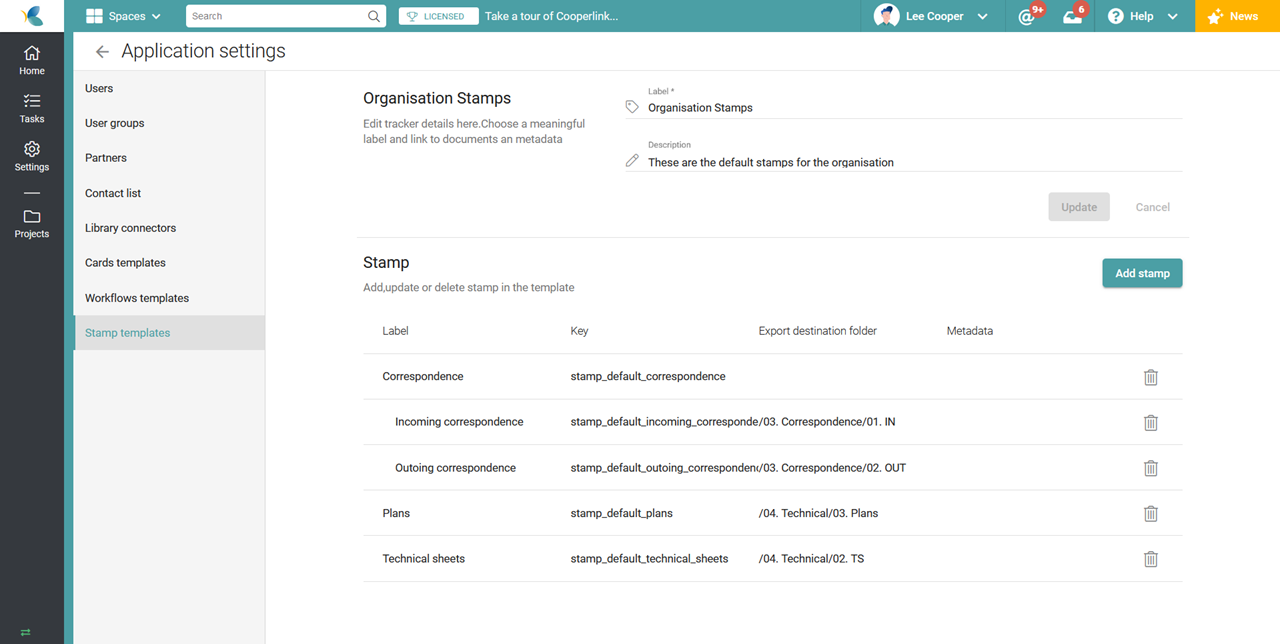
Then move up one level to get an overview of all the buffers configured in that template.
Configure spaces
Congratulations, you have created buffer templates. Now you have to indicate for each project the stamp you want to use. The procedure is explained in Article Configure a workspace for use with stamps.