
This article applies to BOOST EMPOWER licenses
Purpose of the article
This article illustrates how to manually configure a workspace and lists the various essential steps.
Checklist (summary)
Mandatory and optional steps to be carried out
(*) Mandatory steps CONGRATULATIONS! Your workspace is now up and running! | 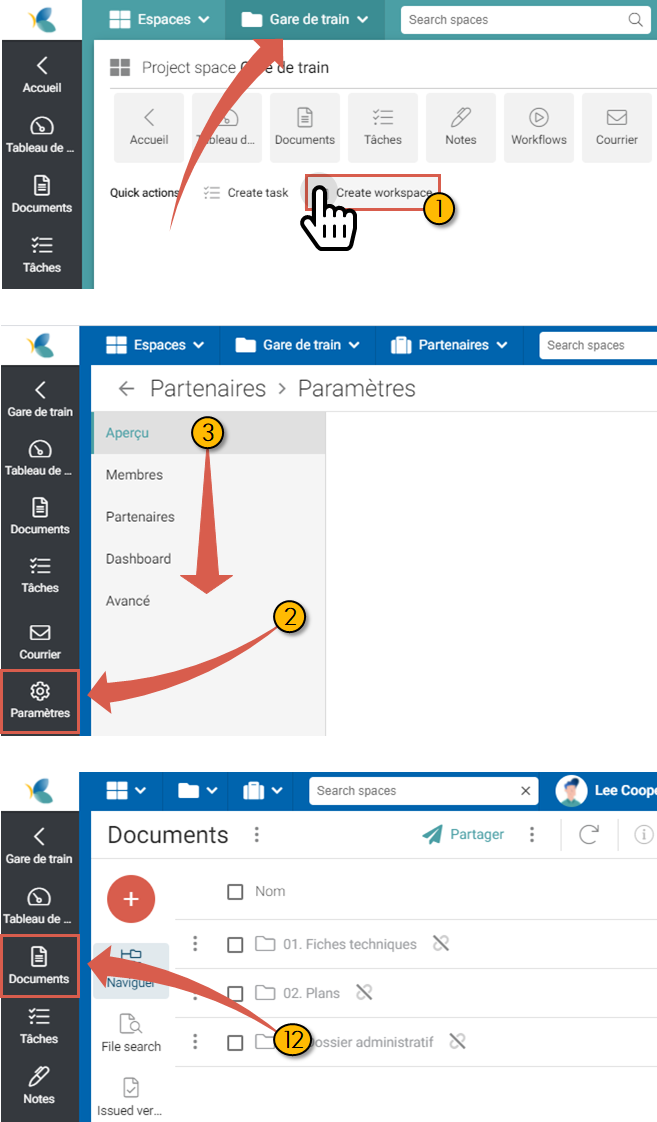 |
Prerequisite
- Creating a workspace requires project manager or administrator rights
- Workspace configuration requires that the project has at least one document library (see Configure a new project in manual mode (+ checklist))
- Steps 6 and 9 through 11 require the site administrator to first configure cards and templates
Detailed procedure
1. Create a new workspace*
To create a new workspace, go to Créer un nouvel espace de travail.
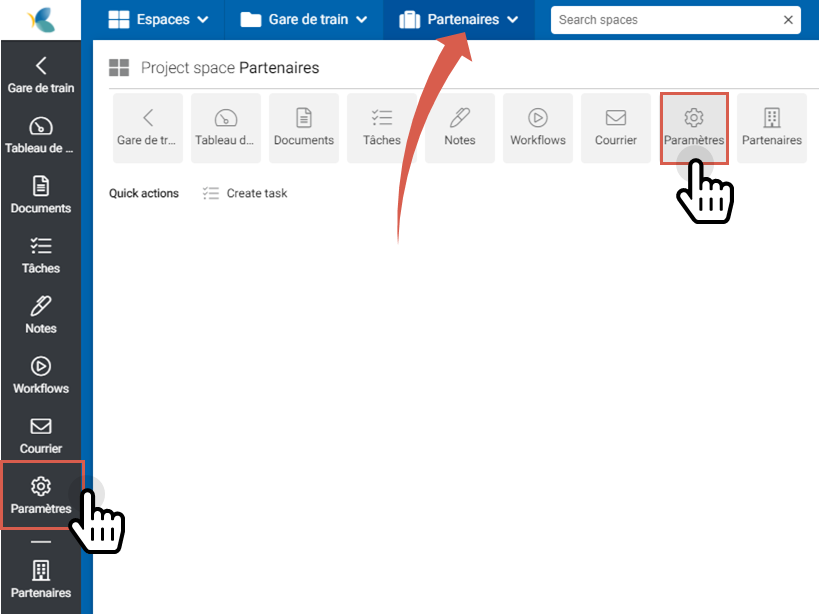
2. Go to workspace settings*
To access workspace settings,
- Use the context menu on your left
- Or the breadcrumb trail in the top bar
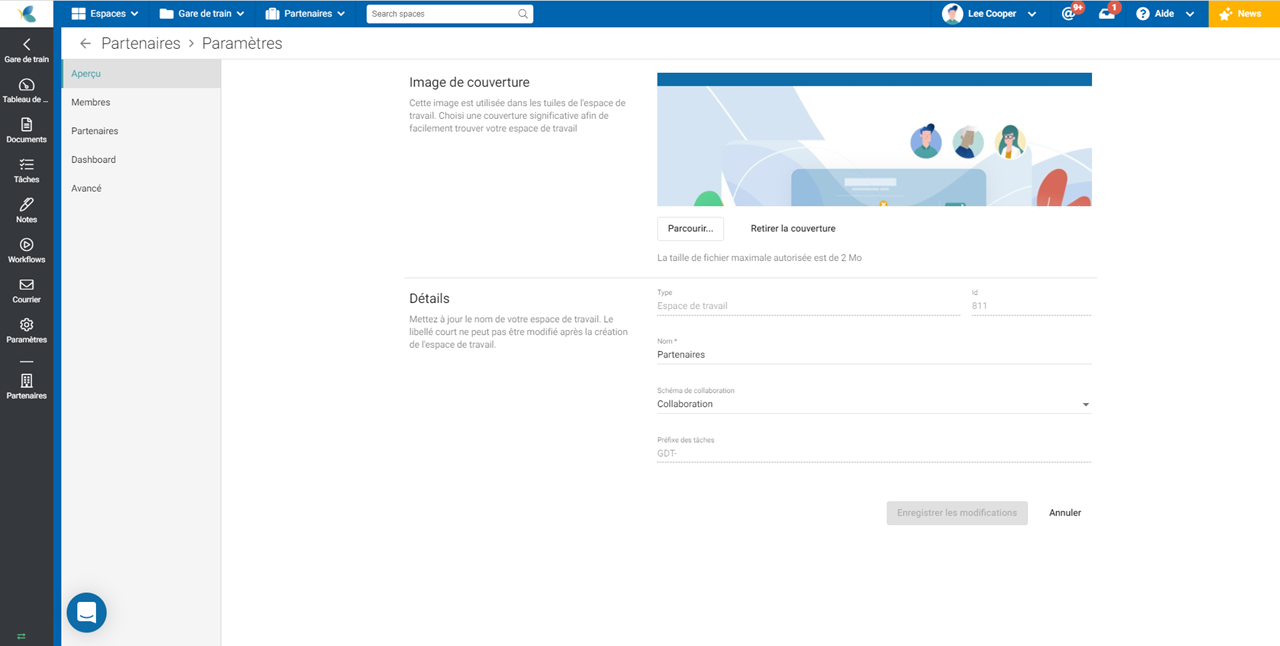
3. Add a cover image and set the details
From the submenu on your left, choose the Preview tab
4. Invite members and assign them a role
In the submenu on your left, choose the Members tab, add users, and assign them a role.
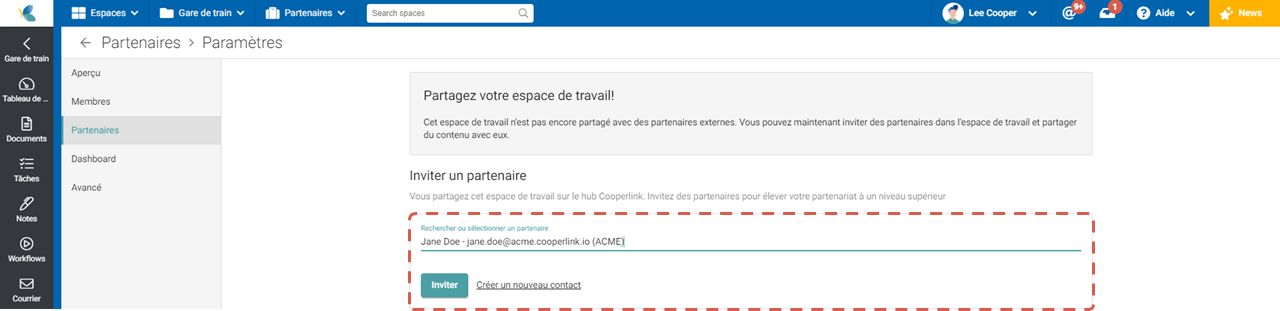
5. Add Partners*
In the submenu on your left, choose the Partners tab, add contacts.
Cooperlink distinguishes partners (companies) and contacts from these partners. Collaboration is carried out between organizations. For guest partners, only guest contacts receive access to workspace information.
To avoid this problem, create a fake contact per partner and assign him a false address e.g. partner1@no.email

6. Define the workspace map
Select the Dashboard tab. The workspace map allows you to enrich your space with metadata. Select a previously configured adapter in the app settings.

7. Set general options*
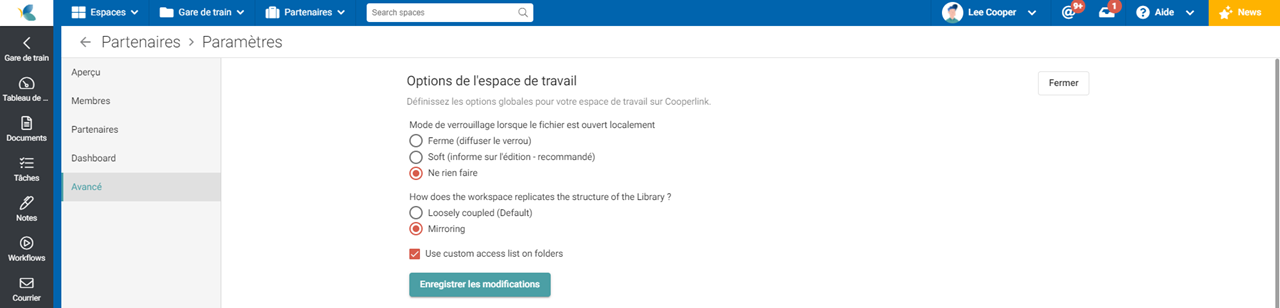
Select the Advanced tab, Workspace Options section.
Replication mode
Then set the global options for your workspace:
- The lock mode: leave on do nothing
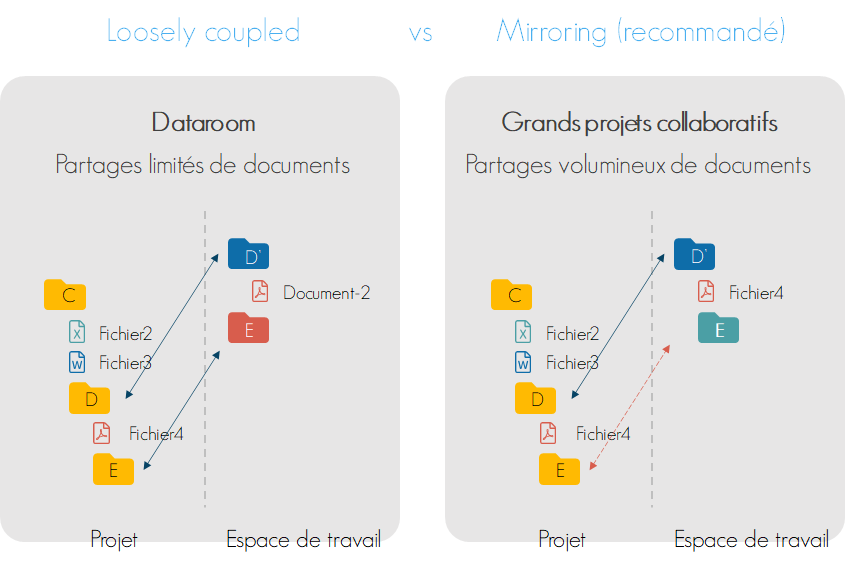
- Replication mode indicates the behavior of the binding with the project
- Loosely coupled:
- Advantage: total freedom of structure
- Disadvantage: lack of tracking of renames and file/folder movements
- Recommendation: Use for initial configuration and limited document sharing
- Mirroring (recommended):
- Advantage: All child elements of an anchor point (link) are in mirror replication. It also tracks any renaming and moving.
- Disadvantage: in the children of the anchor point, the data structure is rigid (imposed by the mirror constraint)
- Recommendation: for use in production and in case of large shares
- Loosely coupled:
Enabling directory access rights
Select the Use custom access rights on directories check box to apply access rights per partner (enterprise).
8. Define rules for input and output flows*
The rules on information exchange flows help determine how Cooperlink behaves in exchanges with your partners. A distinction is made between incoming and outgoing information flows.
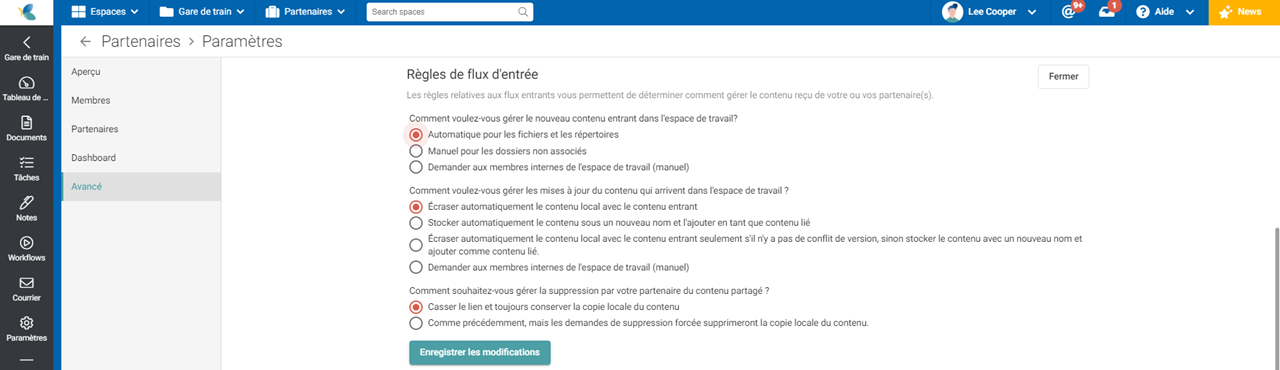
Input flow rules
Select the Advanced tab, Input Flow Rules section
We recommend choosing fully automatic mode as follows:
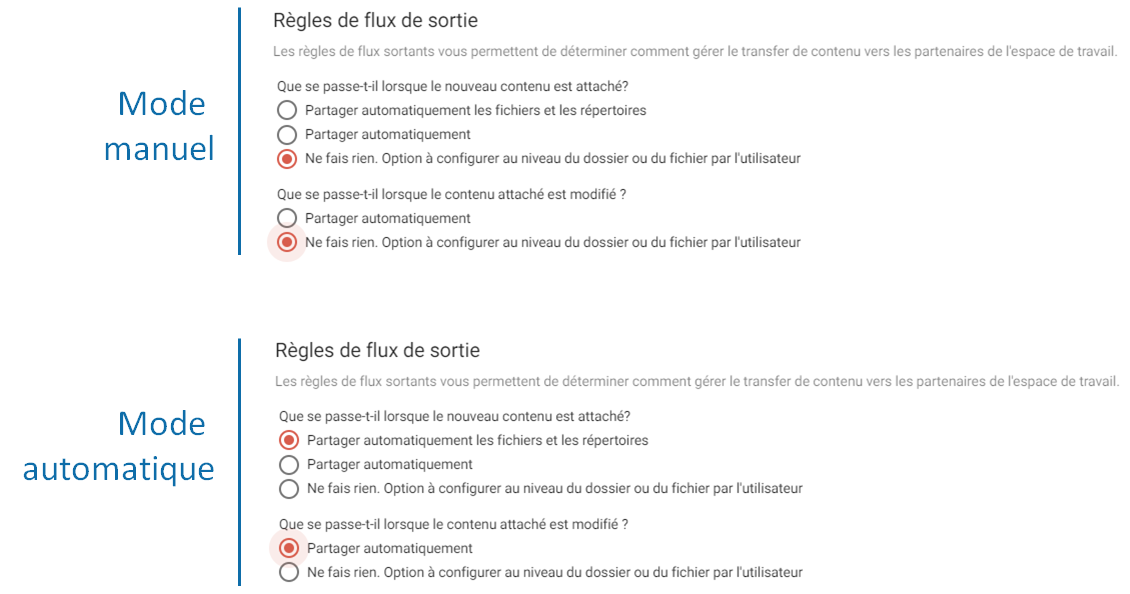
Output flow rules
Select the Advanced tab, Output Flow Rules section
We recommend that you choose
- Either the fully manual mode. You will need to manually share workspace content.
- Either the fully automatic mode. Any new content or updates will be automatically shared with your partner.
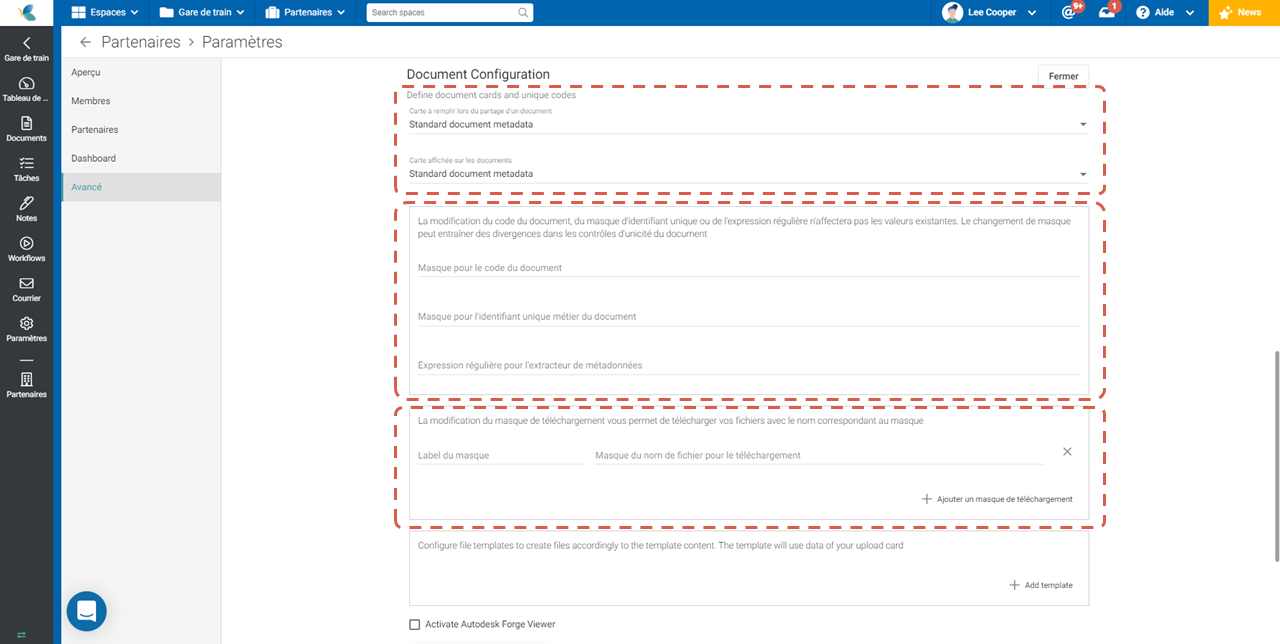
9. Configure document management
Select the Advanced tab, Document Configuration section.
Cards
Document cards allow documents to be enriched with metadata during filing and/or viewing.
Choose the General tab > Documents Configuration section. This requires prior configuration of blank maps and/or document templates.
- Set the document map to display when uploading a document
- Set the document map to display when selecting a document
Documentary code
Cooperlink allows you to create a documentary code. Code creation uses the notation format mustachebased on the document card metadata keys.
The unique identifier ensures the uniqueness of a document within a workspace. It can be the same code, a subset, or a totally different code.
> 1275-{{meta_doc-execution}}-{{meta-doc-type}}-{{meta-doc-activite}}-{{meta-doc-numero}}
Upload with custom file name
Cooperlink allows the user to upload a file with a custom name.
- The label is the name displayed to the user
- The mask uses the notion mustachebased on the metadata keys of the document card. Some keys also exist as standard:
- {{name}} is the original name of the document
- {{document_code}} is the documentary code
- {{publication_date}} is the release date
- Label: Code + Original Name + Version
- Mask: {{document_code}}-{{name}}-{{publication_date}}
10. Configure task management
Task cards are used to enrich tasks with metadata.
Choose the Advanced tab > Tasks configuration section. This requires a prior configuration of cards.
- Define the task card to use

11. Enable Autodesk Forge CAD/BIM Viewer
Autodesk Forge Viewer allows you to view more than 80 CAD/BIM file formats (including DWG, IFC, RVT, ...).
Choose the Advanced tab > Documents Configuration section. Select the Enable Autodesk Forge Viewer check box

12. Create the document structure*
The function of the workspace is to streamline the sharing of information with your partners. The most important action at this level is to create a common, simplified document structure directly related to the project (i.e. to your tools).
Create links between the project space and the workspace
- Go to the Documents module
- Optionally, create a structure with unlinked virtual directories
- Use the project browser to add project directories by dragging and dropping
- Optionally, rename the linked directories. This name will be the one visible to your partners. The source directory remains unchanged!

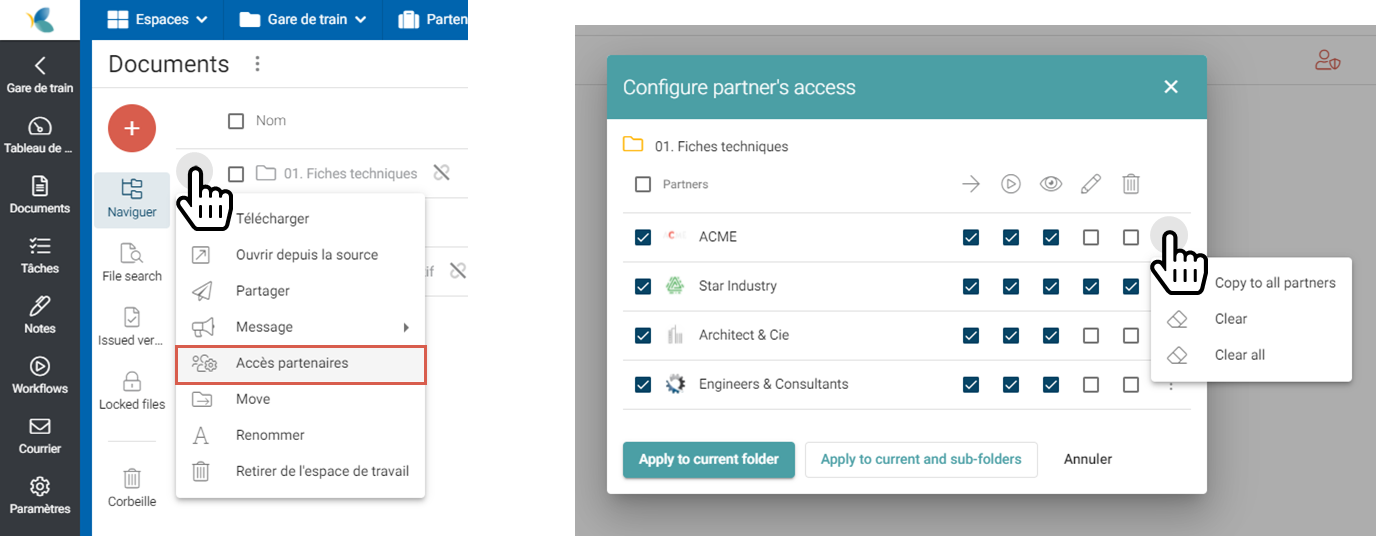
Set partner access rights
Note: This feature only activates if partners (companies) have been previously configured.
- Select the desired directory, click the Partner Access menu. Then define the access rights for each of the partners.
- Additional features allow you to duplicate the configuration on different partners and/or on child directories.
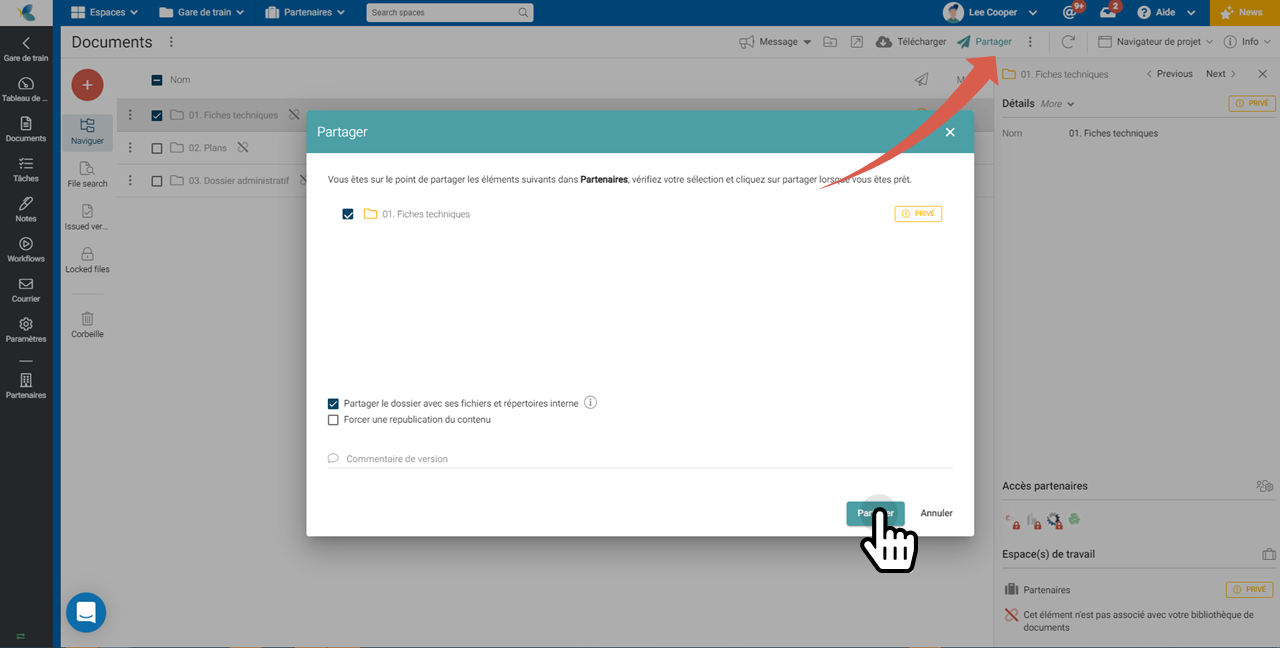
Share directories and documents
Finally, select the directories and/or documents to share with partners (by default, Cooperlink shares the entire workspace). Then tap SHARE. Cooperlink then works in the background.
13. Invite partner contacts
Congratulations, you've completed the setup. All you have to do is invite your partner contacts. Repeat step 5, this time with your actual contacts.