In this article, we will learn how to drop documents into the workspace.
Create a folder
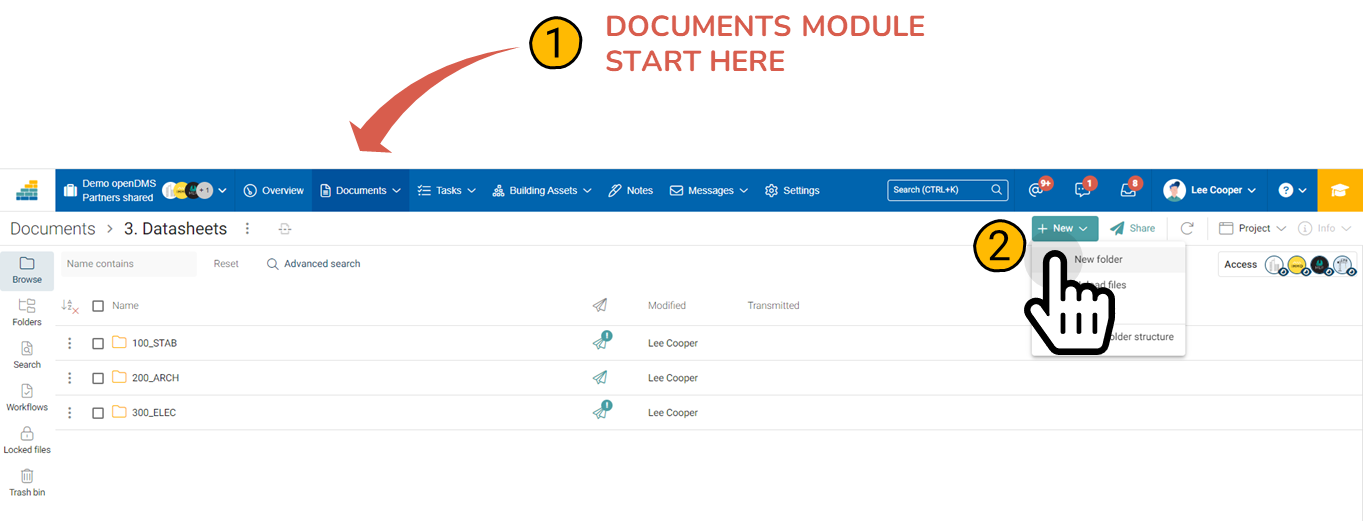
- Access the Documents module using the menu.
- Click the green NEW button and select New Folder.
NOTE - Root / First level folders
Only the workspace manager can create rool folders.
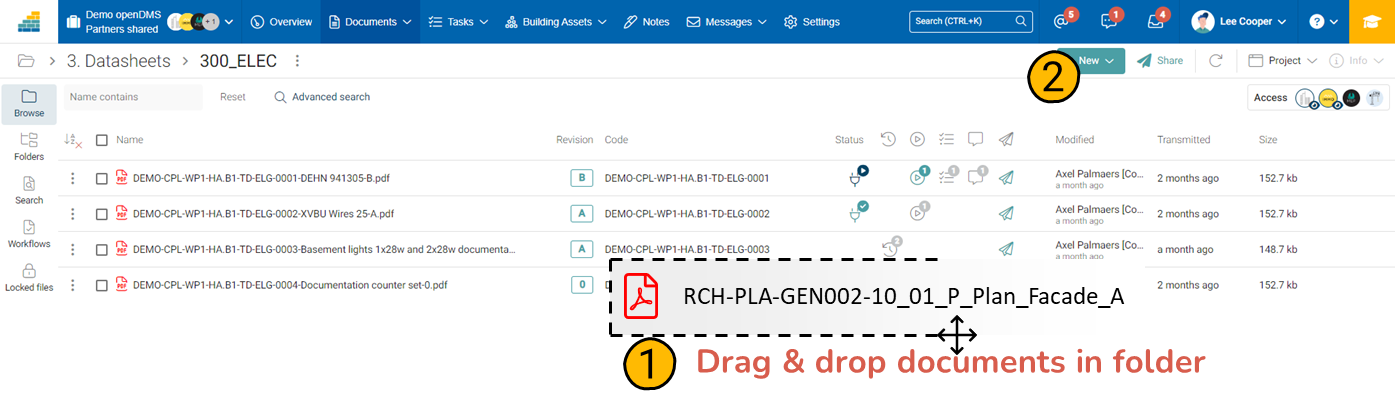
Create a document upload basket
Select documents on your computer and drag them to the desired folder. Alternatively use the green NEW button.
Cooperlink accepts multiple file uploads as well as folders.
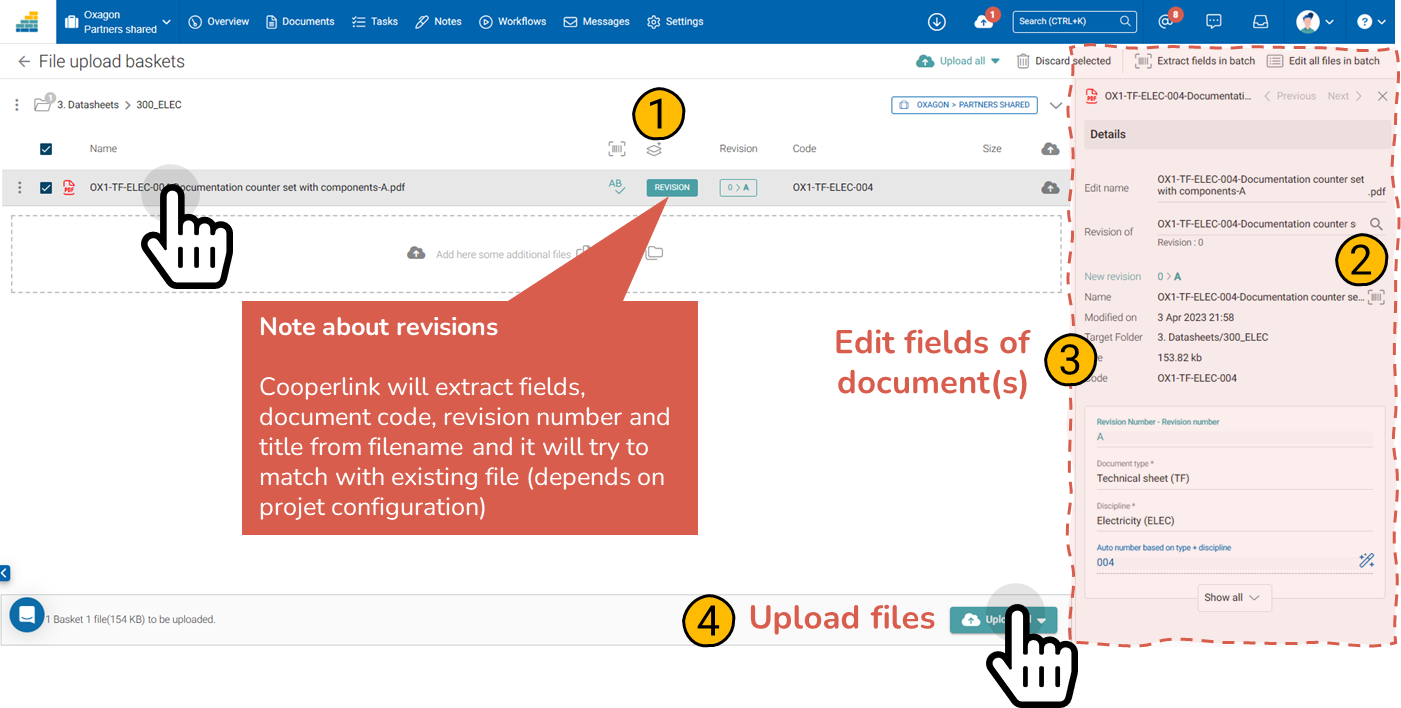
Complete the deposit basket
Cooperlink creates an upload basket per destination folder. In each basket, Cooperlink checks whether the document already exists.
- The Version column notifies you of a new document or version. In the case of a new version, the data already encoded is reused.
- To force the upload of a document as a new version, use the drawer on your right and click Version of
- To edit the metadata of a document, select it and use the drawer on your right.
The action menu also allows you to edit metadata in batch on all or a selection of documents - Once the data is correctly completed, submit your documents
Automatic detection of a new version
To detect a new version, Cooperlink compares the original name of the document with the name of the documents in the destination directory. It also compares document codes. When there is an equivalence, he considers it to be a new version of documents.
Pick up where you left off!
The upload basket is kept throughout your session of use. Want to come back later to finish the upload? Simply click on the upload button (cloud) icon in the top bar and pick up where you left off!